How to Add Audio Streaming to Harmonia3 Documents
How to Add Audio Streaming to Harmonia3 Documents
By: Rachel Mann
July 17, 2019
An exciting new feature of Harmonia3 is our audio-streaming service, which enables teachers to embed and control high-quality audio in their Harmonia documents. In Harmonia3 all audio is streamed from our server, using settings added by teachers in their personal media library. The media library is a new, free feature of your Harmonia teacher’s account on our website. Use it to create assignments and exams with external audio clips or stream audio examples, complete with adjustable, teacher-controlled settings for things like dictation practice and exams all from our Harmonia website. Follow the steps below to get started.
So how does it work?
Step 1: Upload audio files to your Harmonia account.
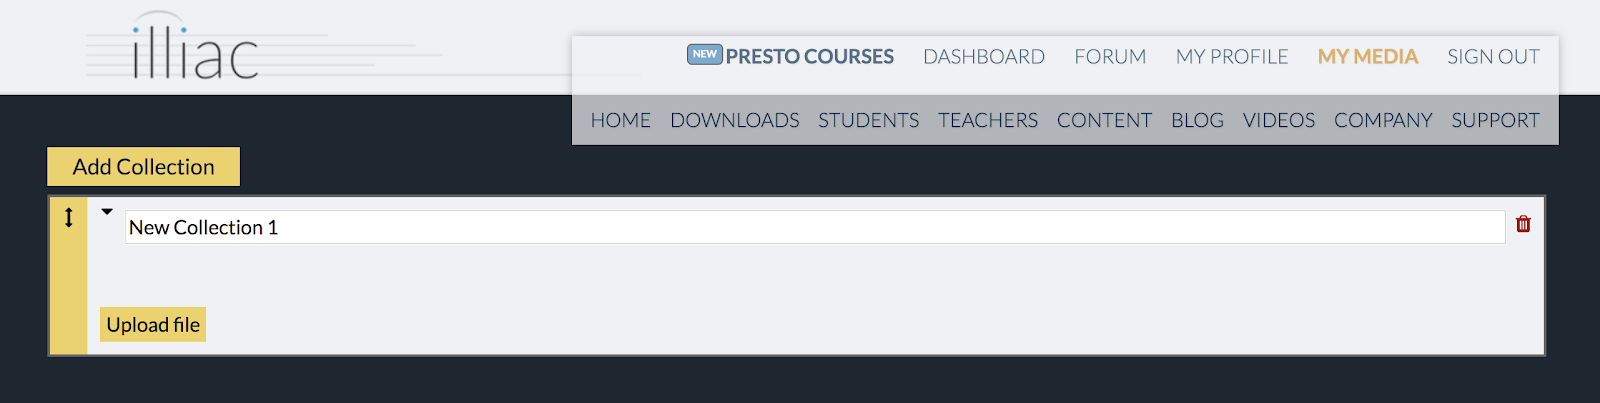
First, you will need to log in to our website using your teacher account and select "My Media” at the top of the page. (Note: only users with teacher accounts will be able to view the “My Media” tab on our website.) This area will allow you to upload audio files and organize them into different "Collections". For example, you may want to create a collection for each class you teach, or you may want collections to represent specific types or kinds of music or assignments.

Click the gold “Add Collection” button to add a new collection to your personal media library. Give your collection a title if desired. Then click the gold “Upload file” button to add a sound file to your collection. Our online media library accepts all current audio formats, including aiff, flac, m4a, mp3, ogg, and wav, so there will be no need to additionally convert your favorite files.
Once an audio file is uploaded, you can label it, listen to it, move it from one collection to another, or delete it. Use the arrows on the left side of the file to drag and place files into a specific order. Collections may also be reordered in the same way. Simply drag the arrows on the left side of the collection to move collections to the desired location.
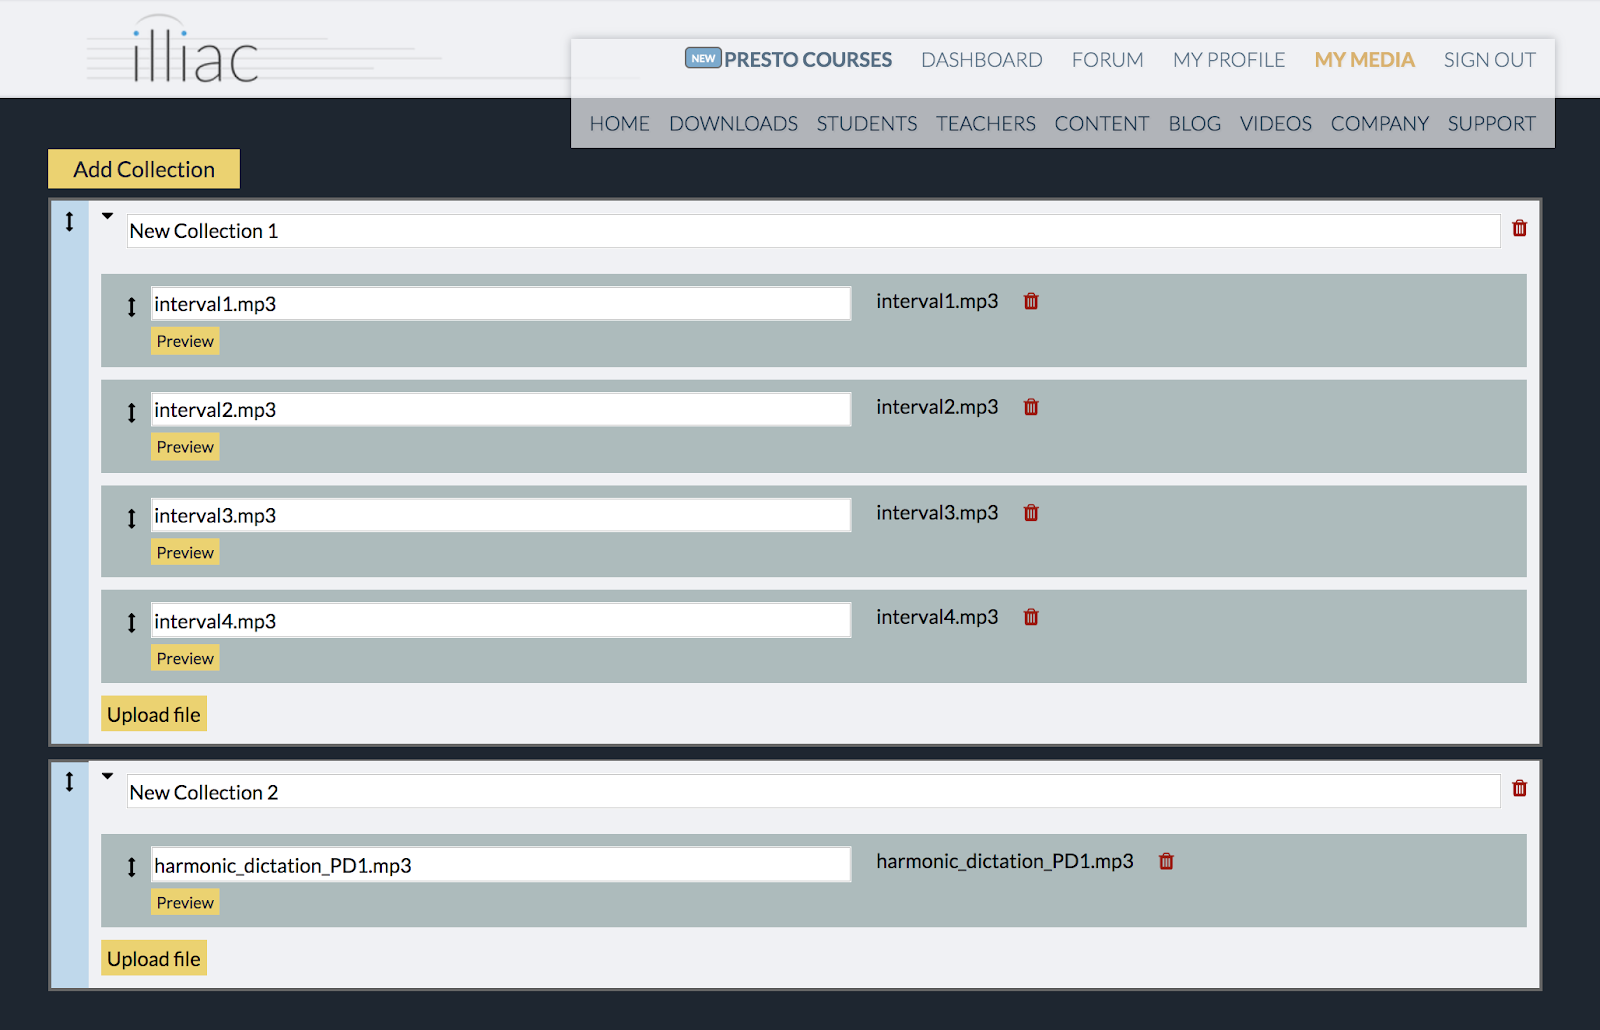
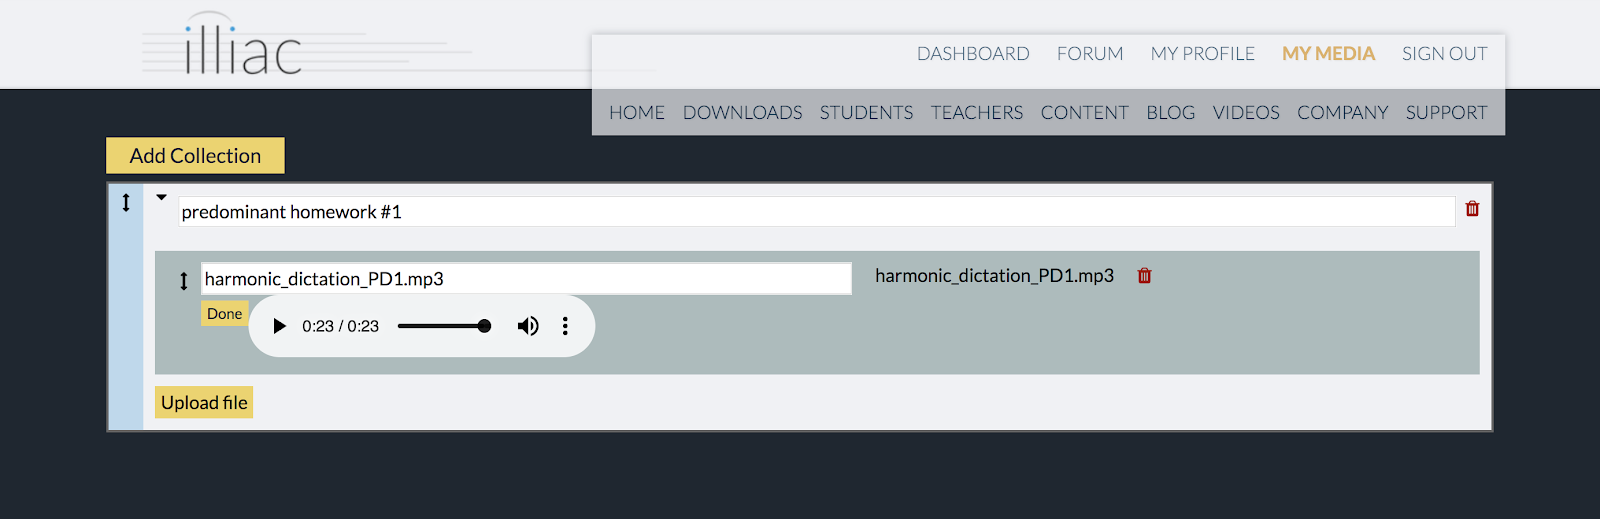
Once a file has been added to a collection, click the “Preview” button to listen to the file. Remove files by clicking on the trashcan icon on the right.
Step 2: Add streaming audio to your assignments.
As soon as you start the Harmonia app and log in with your teacher account, Harmonia3 will automatically download your media collections and make them available for selection. To add an audio file to a Harmonia3 document, sign in to the app using your teacher account and then open a Harmonia document. As seen below, I first added a harmonic dictation example to my media collection on the website and then opened Harmonia 3, logged in, and then added the file to my Harmonia document below.

To add the audio example to the document, click on “Streaming Audio” in the Insert menu and then scroll down to find the desired audio file. Click on the file to add it to the page. Once the resource is added, a blue headphone icon will appear on the left side of the page.

Note that a single streaming audio resource can be added multiple times across different documents or even within the same document; each individual instance of the audio can be customized as described below.
Step 3: Configure the attached audio for student to use
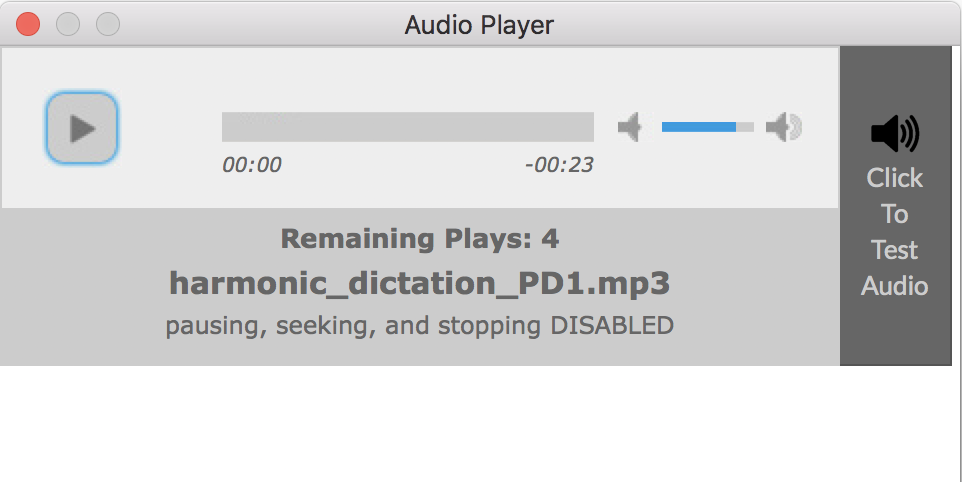
On the right, select from a menu of playback limitations if desired. These options enable teachers to add or remove playback constraints for a given audio example. Such playback limitations may be desirable for dictation practice and exams. By default there are no restrictions: students may listen to an audio attachment as many times as desired, pause, fast-forward or rewind as needed. However, we have built our system to enable teachers to restrict playback to a certain number of repetitions, and to "disable" the rewind and/or pause button. These restrictions are managed by the audio server so even if a student quits and restarts the app, the limits established by the teacher will remain in effect.
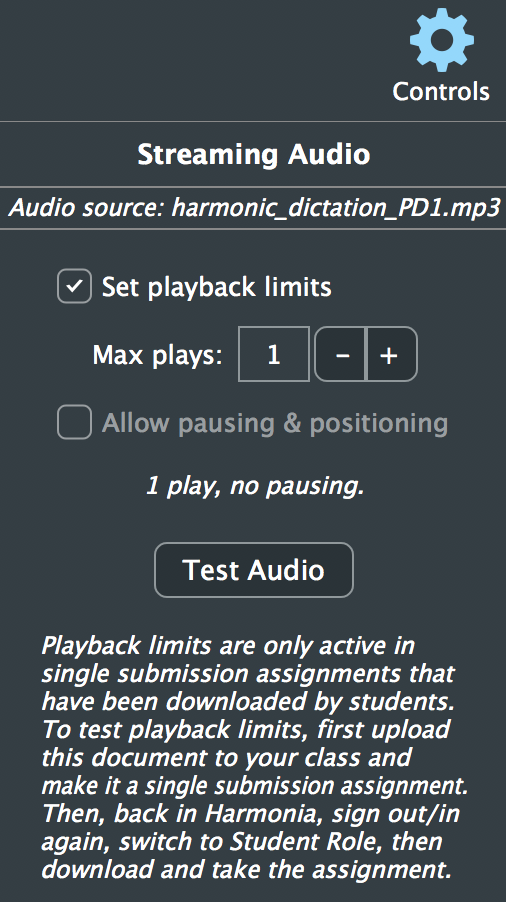
Note that all limitations are disabled for teachers in their audio transports, but when a student opens his or her audio player, any limitations and number of playbacks are clearly indicated in the transport window.
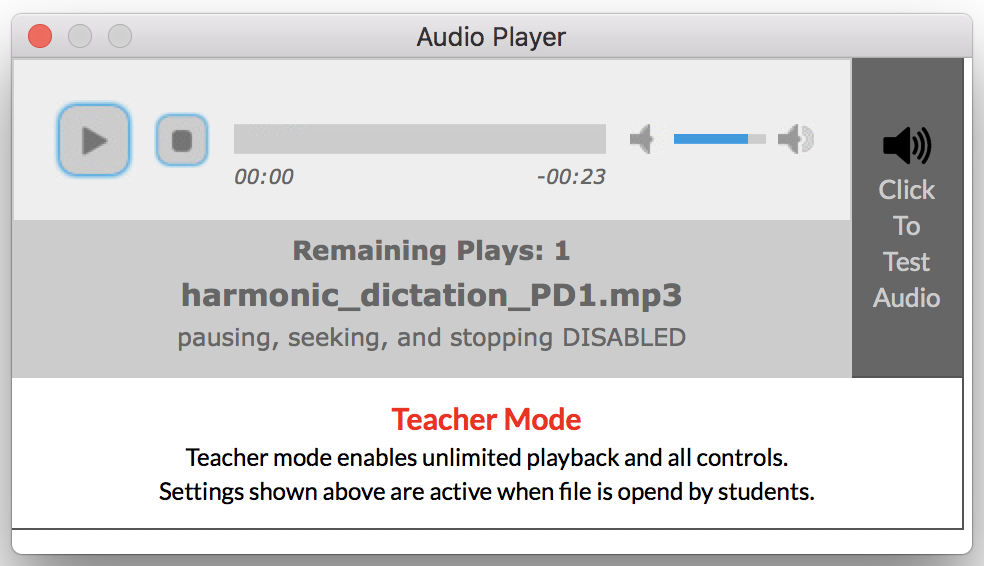
Teachers can toggle between teacher and student modes from inside the app by clicking on the teacher/student buttons beside their name at the upper right to mimic their students’ experience. Note that all playback limits placed on an attachment are displayed on the audio transport so students can always be aware of how many times they can play an example and whether or not they can pause or rewind. The transport also provides a handy “Test Audio” button enabling students to test their equipment before playing a constrained audio example, so as to not waste a hearing checking their Internet connection or audio volume.
Once the desired number of audio files, text, musical examples, and/or images have been added to a Harmonia document, simply save the file and upload it to your course in the Harmonia dashboard. And that is it! Although easy to use, our new audio streaming service is quite powerful and is certain to improve the learning experience for your students. We know this service has many possible uses beyond what we have thought of and we look forward to learning about how you use it in your teaching. As always, if you have any questions about adding streaming audio to your Harmonia3 documents, please do not hesitate to contact us at contact@illiacsoftware.com.